SolarNodeOS Compulab IoT Device Guide
SolarNetwork provides SolarNodeOS images for various Compulab IoT devices.
To get the SolarNodeOS image installed on the IoT device requires a 3-step process:
- Copy the image file to a USB stick
- Boot the device from the USB stick
- Copy the USB stick to the device eMMC
The procedure here depends on the operating system of your workstation. Choose the method that works best for you:
- Option A: GUI
- Option B: macOS command line
- Option C: Linux command line
☝️ Make sure the USB stick is at least as large as the OS image name indicates, e.g. an image named
solarnodeos-deb12-iotgate_imx8-2GB-20260101requires 2GB or larger media.
The free graphical Etcher tool makes the process simple, and it supports Windows, macOS, and Linux.
On macOS, use diskutil list to find the name of the device for the USB stick. You'll see output
like this:
/dev/disk4 (external, physical):
   #:                       TYPE NAME                    SIZE       IDENTIFIER
   0:      GUID_partition_scheme                        *15.5 GB    disk4
   1:           Linux Filesystem                         123.7 MB   disk4s1
   2:           Linux Filesystem                         1.1 GB     disk4s2
					(free space)                         14.3 GB    -
Then you can make sure the USB stick is not mounted and copy the image to it like this:
sudo diskutil unmountDisk /dev/disk4
xz -cd IMAGE_NAME_HERE.img.xz |sudo dd of=/dev/rdisk4 bs=2m
☝️ Note when writing to the device with
ddprefix the device name with ar, so/dev/disk4becomes/dev/rdisk4.
Use lsblk to list the disks on your system. You'll see output like this:
NAME      MAJ:MIN RM  SIZE RO TYPE MOUNTPOINT
sda         8:0    0   50G  0 disk
├─sda1      8:1    0   48G  0 part /
└─sda5      8:5    0    2G  0 part [SWAP]
sdb         8:16   0   20G  0 disk /opt
sdc         8:32   0   20G  0 disk
sdd         8:48   1  1.9G  0 disk
├─sdd1      8:49   1   56M  0 part /media/matt/boot
└─sdd2      8:50   1  1.8G  0 part /media/matt/SOLARNODE
sr0        11:0    1 1024M  0 rom
'In this example the sdd disk is the USB stick we're interested in. It might be sdb or something
else entirely on your system.
Then make sure the USB stick is not mounted by unmounting any partitions listed for that disk
(sdd1, sdd2 in this example) and then copy the image to it like this:
'
sudo umount /dev/sdd1
sudo umount /dev/sdd2
xz -cd IMAGE_NAME_HERE.img.xz |sudo dd of=/dev/sdd bs=2M
The most reliable way to log into the device is by using the serial console. For that you need a USB cable, with micro USB on one end to plug into the USB port labeled Console on the device. Plug the other end into your workstation.
Connecting to the console depends on your operating system:
Use PuTTY to connect to the appropriate COM port. See guides like this one for help.
The screen tool to can be used to connect to the appropriate USB device. For example:
# macOS
screen /dev/tty.usbserial-0236DBD7 115200

# Linux
screen /dev/ttyUSB0 115200
Once connected via screen, type Cntl-a followed by k to exit the console.
Another option is the picocom tool, like:
# Linux
picocom -b 115200 -r -l /dev/ttyUSB0
Once connected via picocom, type Cntl-a followed by Cntl-k to exit the console.
Once connected to the serial console, plug your USB stick into the device and connect it to power. It will boot from the USB stick, eventually reaching a login prompt. Log in with these initial credentials:
| Username | Password |
|---|---|
solar |
solar |
Run the following commands:
# 1: reset SolarNode to clean state
sn-reset -a && sn-stop

# 2: Remove SSH host keys
sudo rm -f /etc/ssh/ssh_host*

# 3: Ensure /boot/grub directory exists
[ -d /boot/grub ] || sudo mkdir /boot/grub

# 4: Copy image to eMMC
sudo cl-deploy
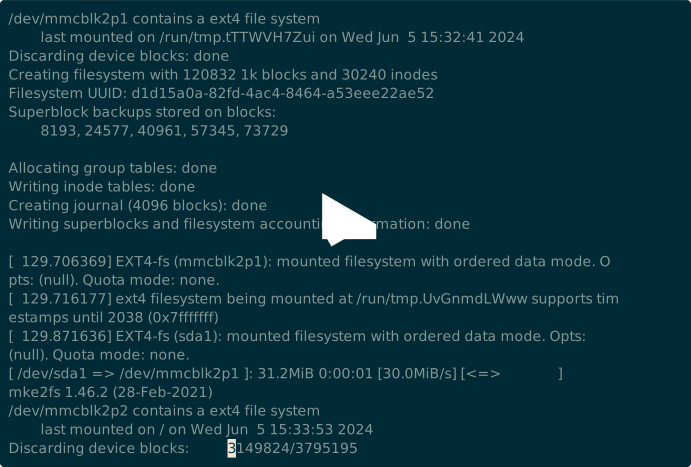
Follow the prompts given by the cl-deploy script. Use the Tab key to move the cursor,
Space to select items, and Enter to action buttons. On the first screen you
must first select the destination device, even though there is only one option:

Eventually you will be prompted to reboot. Choose No and then manually shutdown by running:
sudo shutdown -h nowWait for the OS to shut down. The last message printed on the console should look like this:
[ 140.477963] reboot: Power down
Now disconnect power, unplug the USB stick, and then you can reconnect to power to have the device boot up from the eMMC. The process should resemble this recording: